1. Overall dashboard view
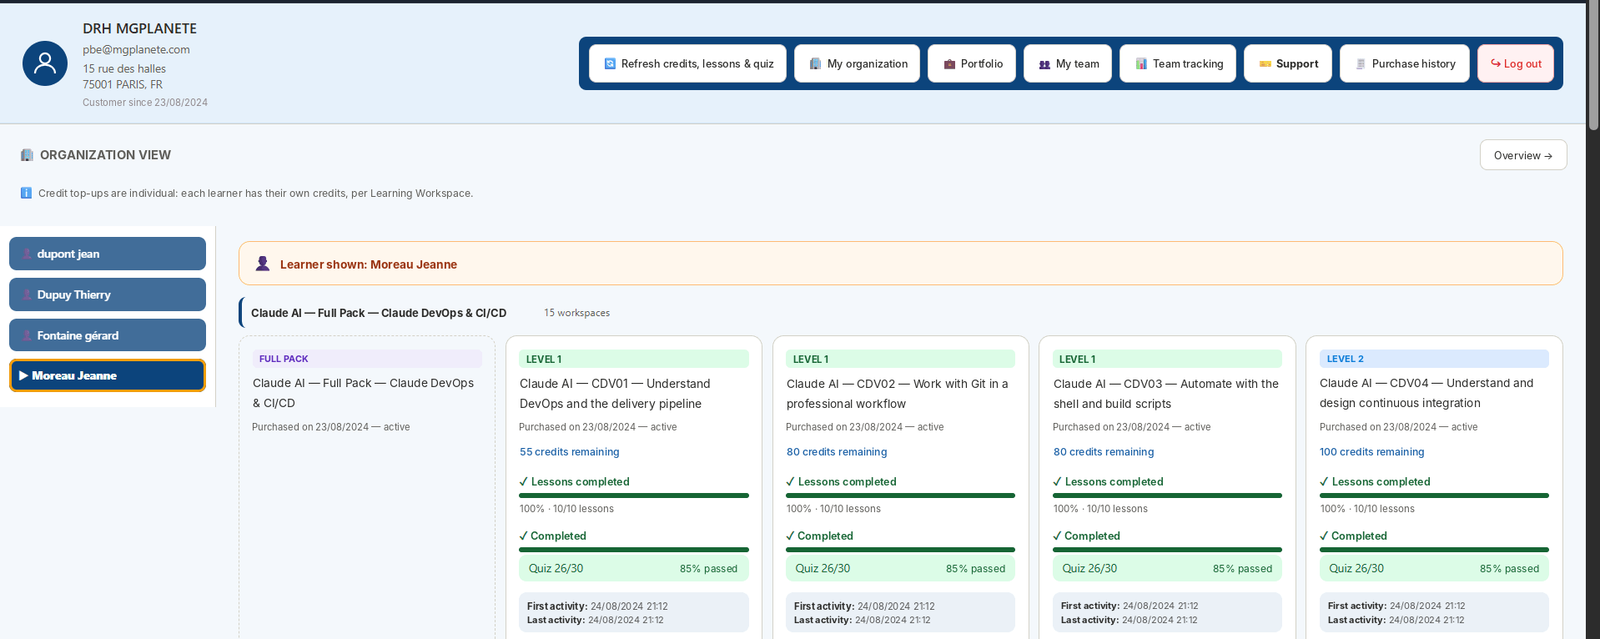
The Organisation / HR dashboard centralises both organisation administration and learner tracking. Depending on the page, you will find a top action header, management areas (organisation, portfolio, team) and more learning-oriented tracking views.
In the view shown below, the left column is used to select a learner and the main area displays the learner’s Learning Workspaces, credits, progress, quiz status and activity. This screenshot gives the overall logic of the Organisation / HR account.
2. Action header: what each button does
The top action header is the most important entry point of the Organisation / HR account. It combines the account identity on the left and quick actions on the right.

- Refresh credits, lessons & quiz: updates the indicators displayed across the account pages.
- My organisation: opens the administrative profile of the organisation.
- Portfolio: shows every Learning Workspace purchased, already assigned or still available.
- My team: lets you add learners and assign Learning Workspaces.
- Team tracking: opens the learning-tracking view and progress summary for learners.
- Support: gives access to the general support area of the account.
- Purchase history: groups the purchases and invoices managed by the organisation.
- Log out: closes the Organisation / HR account session.
3. My organisation
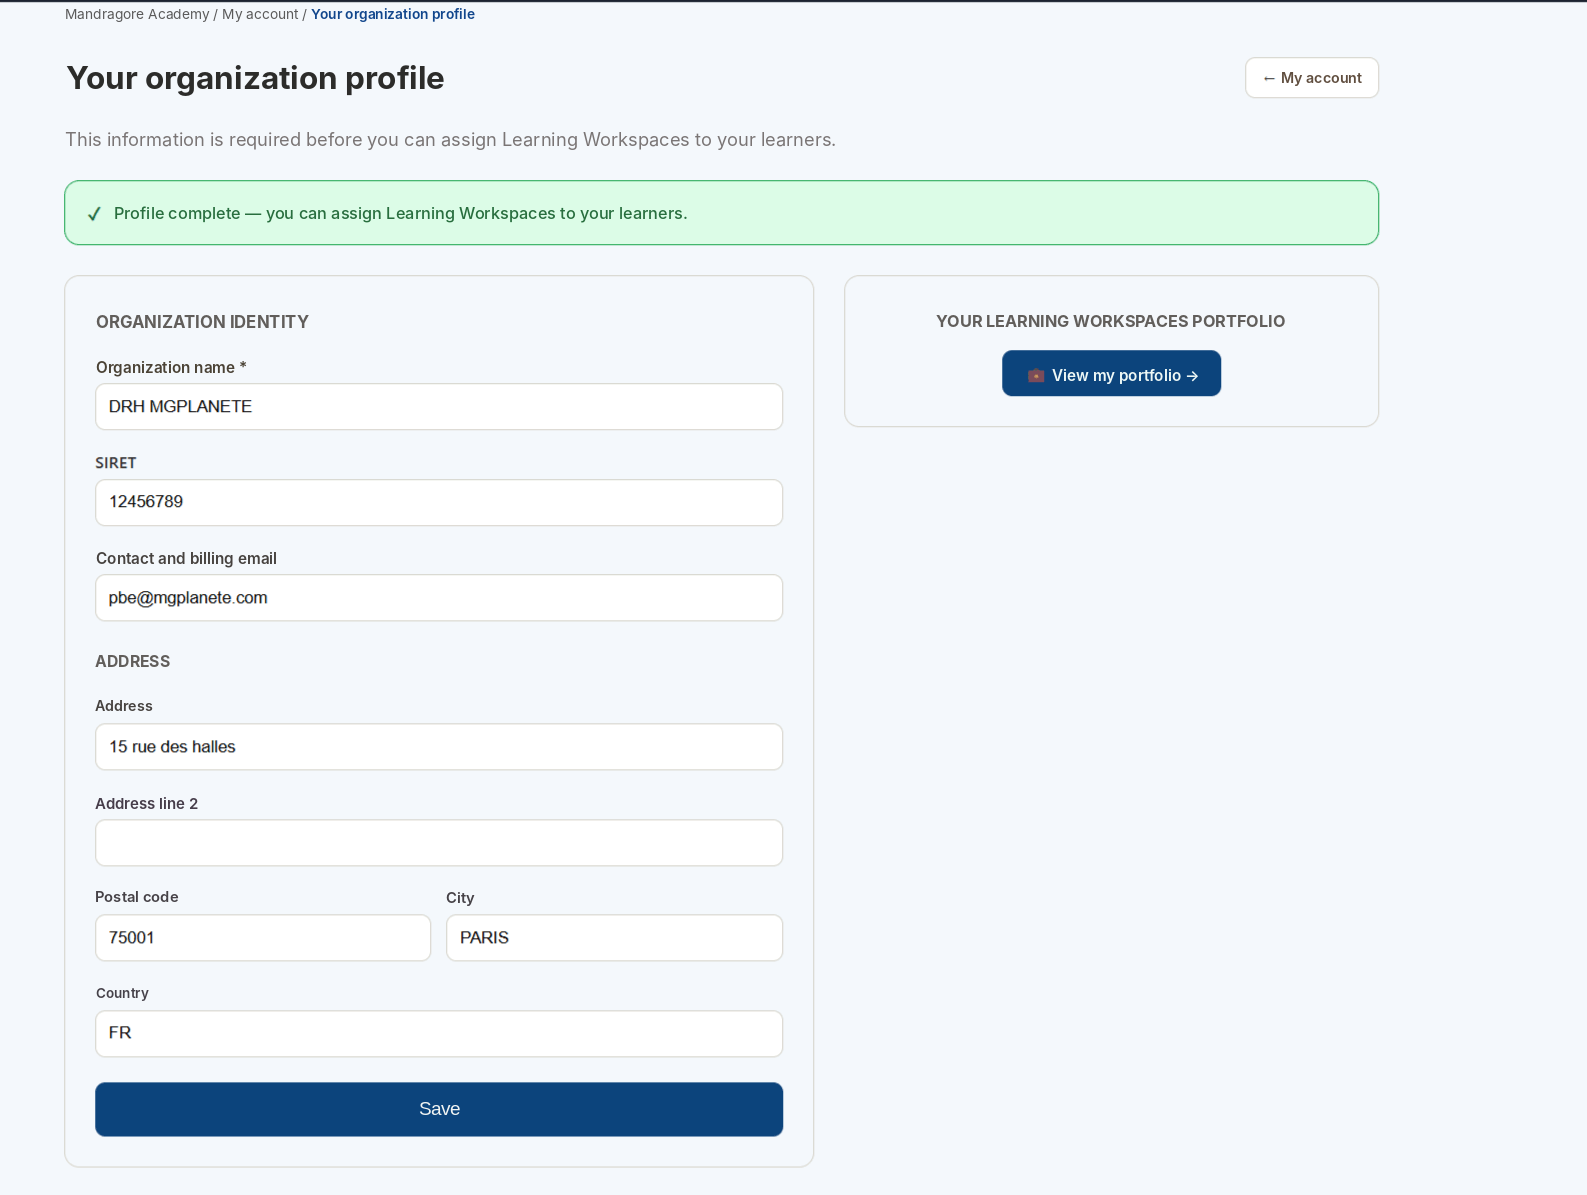
The My organisation page gathers the information required before assigning Learning Workspaces: organisation name, company ID (SIRET), contact and billing email, address, address line 2, postal code, city and country.
When the profile is complete, a validation message confirms it. A shortcut to the portfolio is also available to continue directly with training-license management.
4. Learning Workspaces portfolio
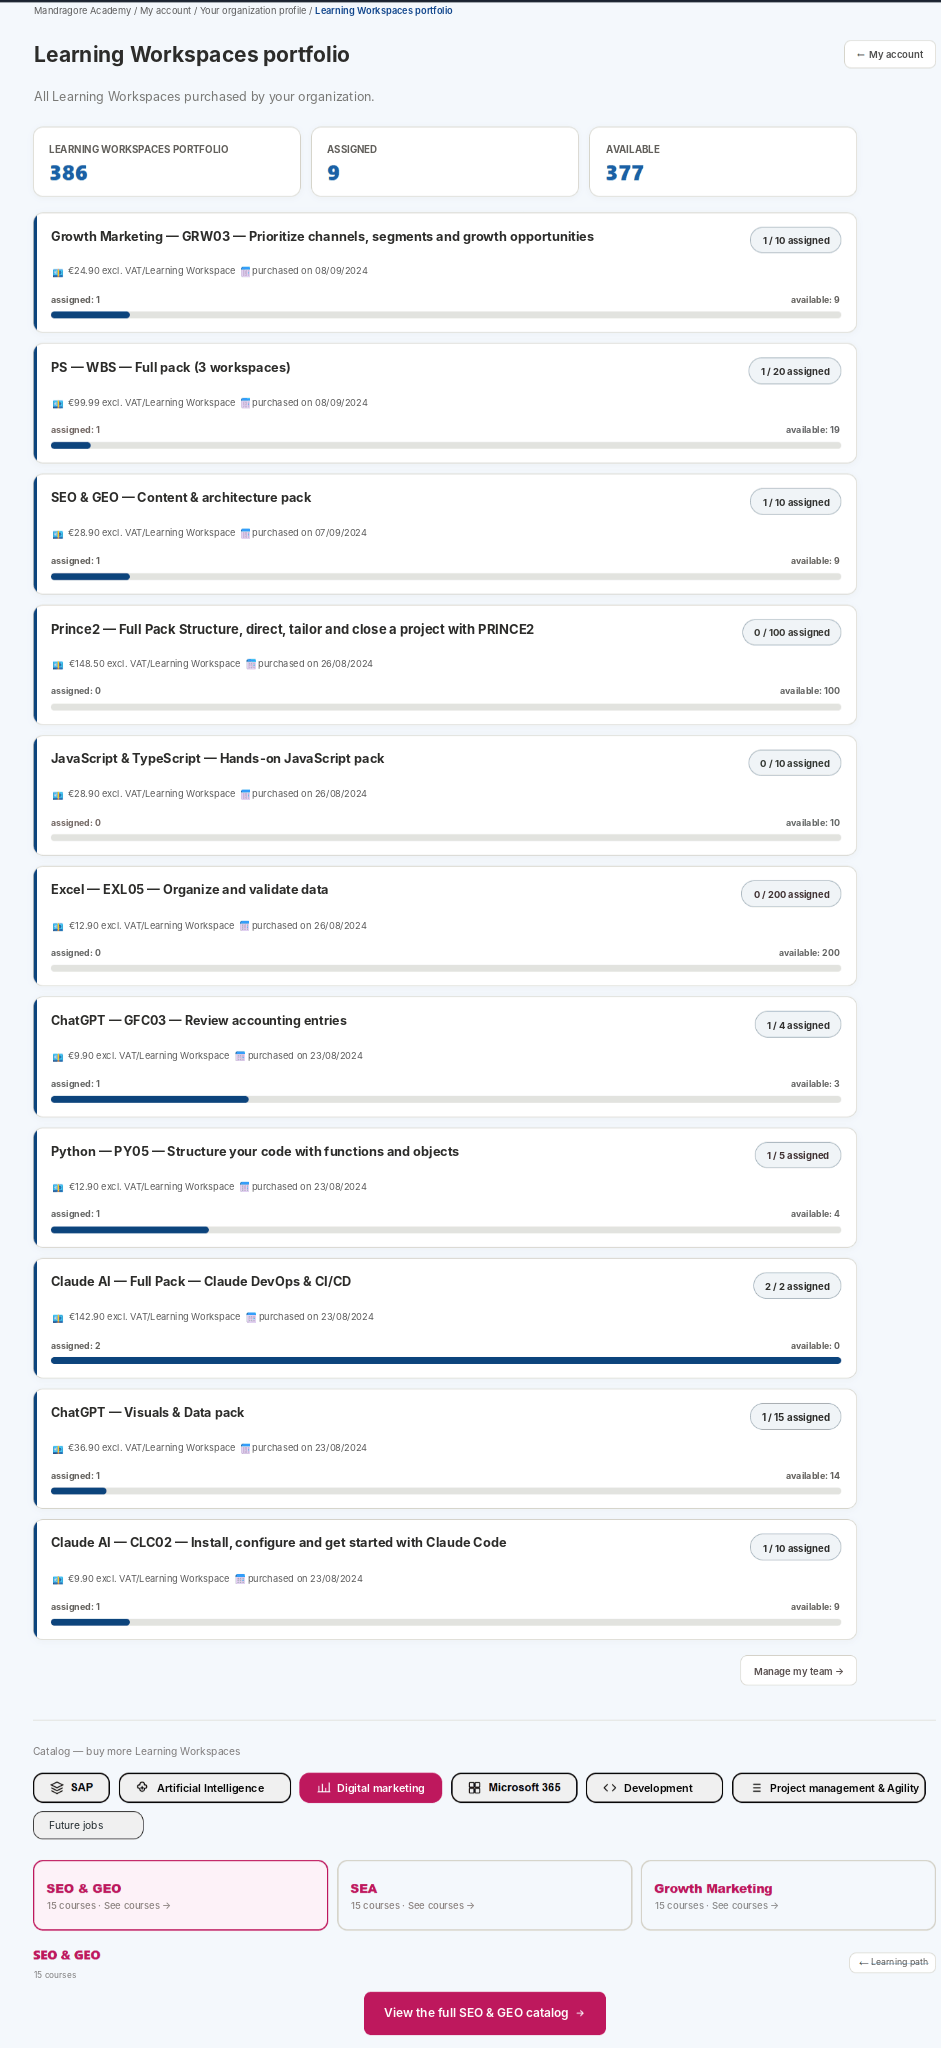
The portfolio lists all Learning Workspaces purchased by the organisation. The counters at the top separate the total portfolio, the number already assigned and the number still available.
Each row displays the training title, price excluding VAT, purchase date, assigned quantity, available quantity and a distribution bar. At the bottom of the page, the catalogue lets the organisation buy additional Learning Workspaces by domain.
5. Add a learner
In My team, the Add a learner form is used to create a learner account. The learner name is mandatory. Then the organisation can choose to enter either an email address or a login ID. Both are not required at the same time.
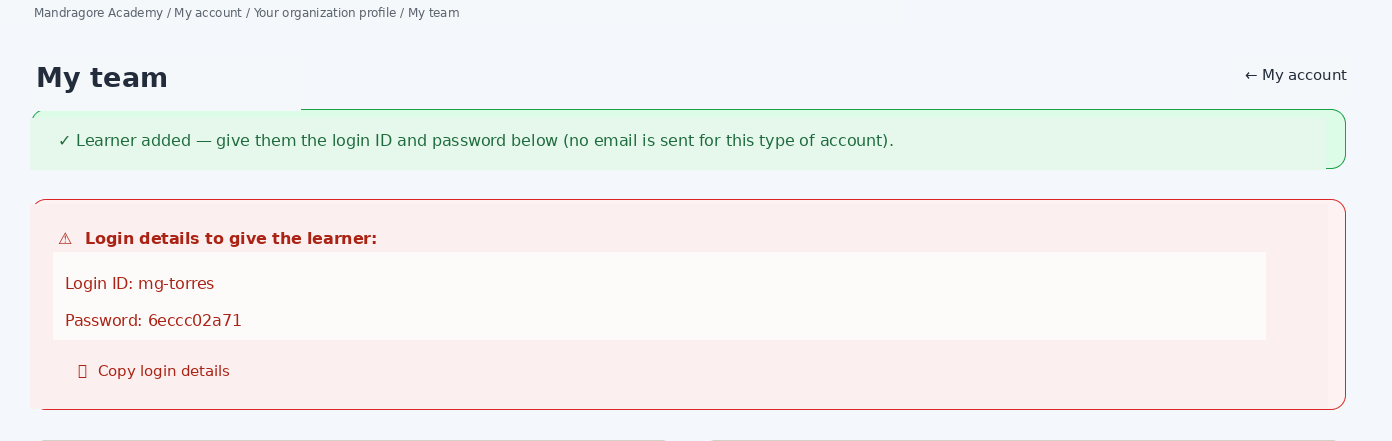
When an account is created with a login ID, a panel immediately displays the credentials to share with the learner. The copy button helps retrieve that information quickly.
6. Choose a learner and assign courses
Still in My team, the left side is used to add a learner. The block on the right is then used to choose an existing learner and select the Learning Workspace to assign.
Further down the page, the team overview lists learners, their login IDs or email addresses, and the Learning Workspaces already assigned to them. This is also where you find the day-to-day management actions.
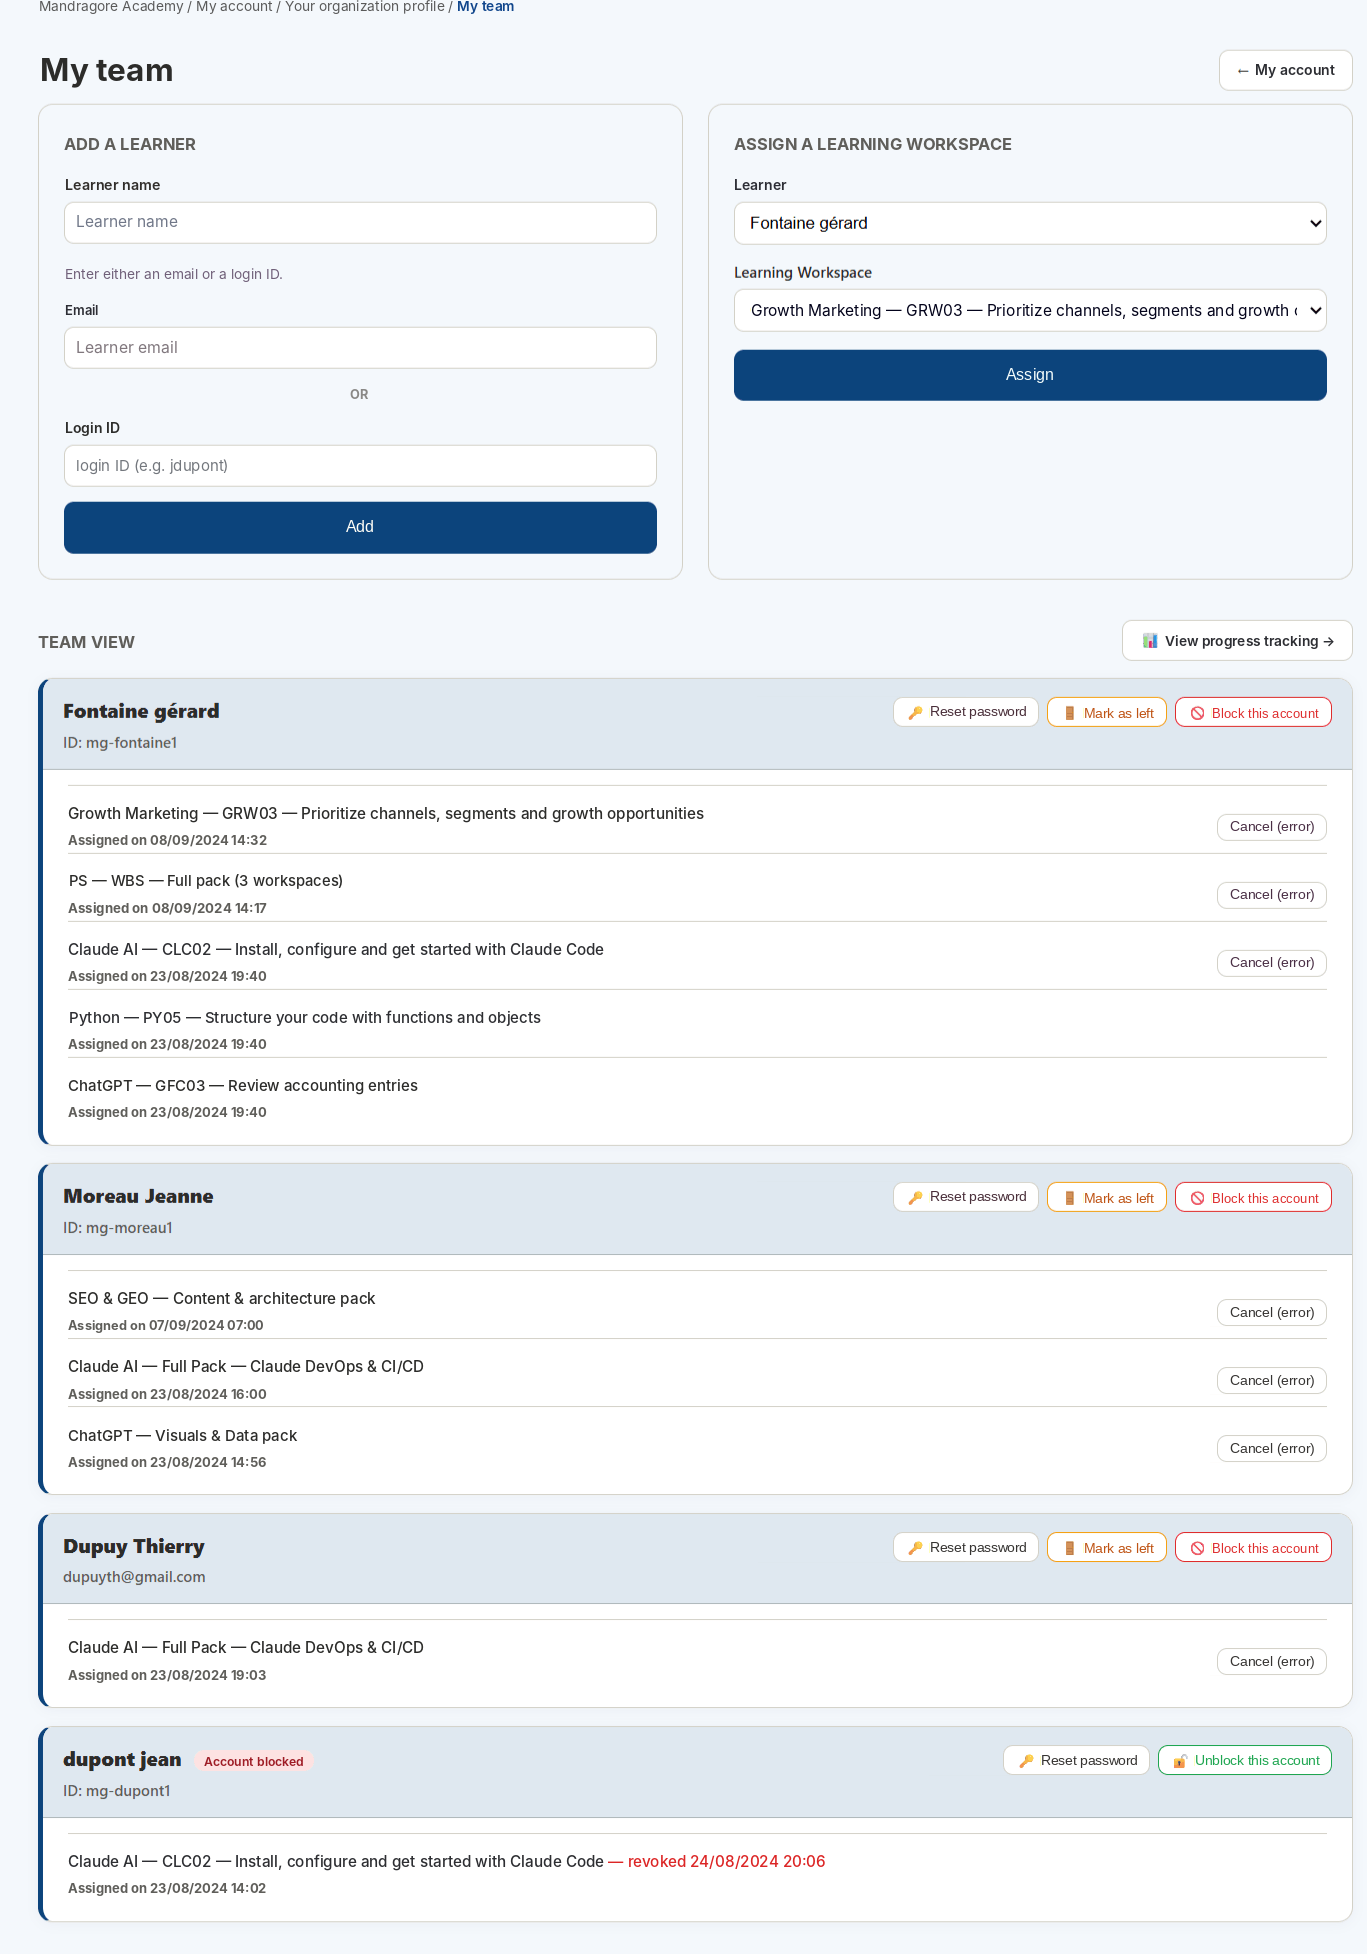
- Assign a Learning Workspace to an existing learner.
- See which courses are already assigned to each learner.
- Reset the password of a learner account.
- Cancel an assignment when it was made by mistake.
- Block or unblock a learner account.
- Mark a learner as departed when needed.
7. Team tracking: global indicators
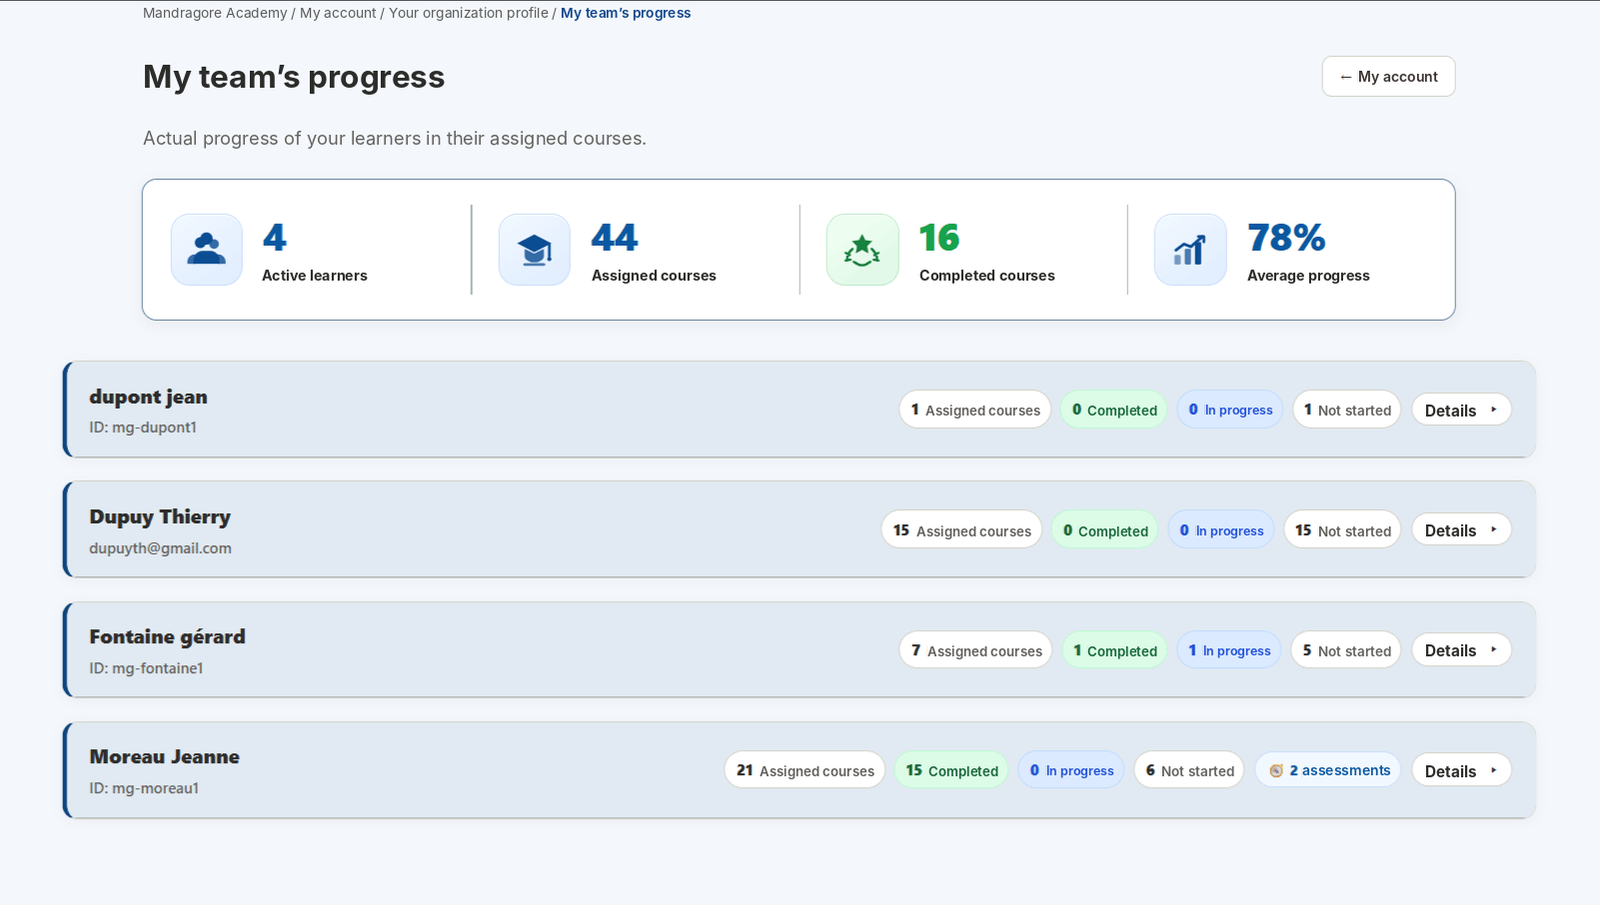
The Team progress tracking page provides an overall summary. At the top, four indicators give the big picture: active learners, assigned courses, completed courses and average progress.
Below those counters, each learner appears on one row with several badges: total assigned courses, completed, in progress, not started and, when relevant, the number of starting-level assessments completed.
8. Team tracking: detail view and scoring
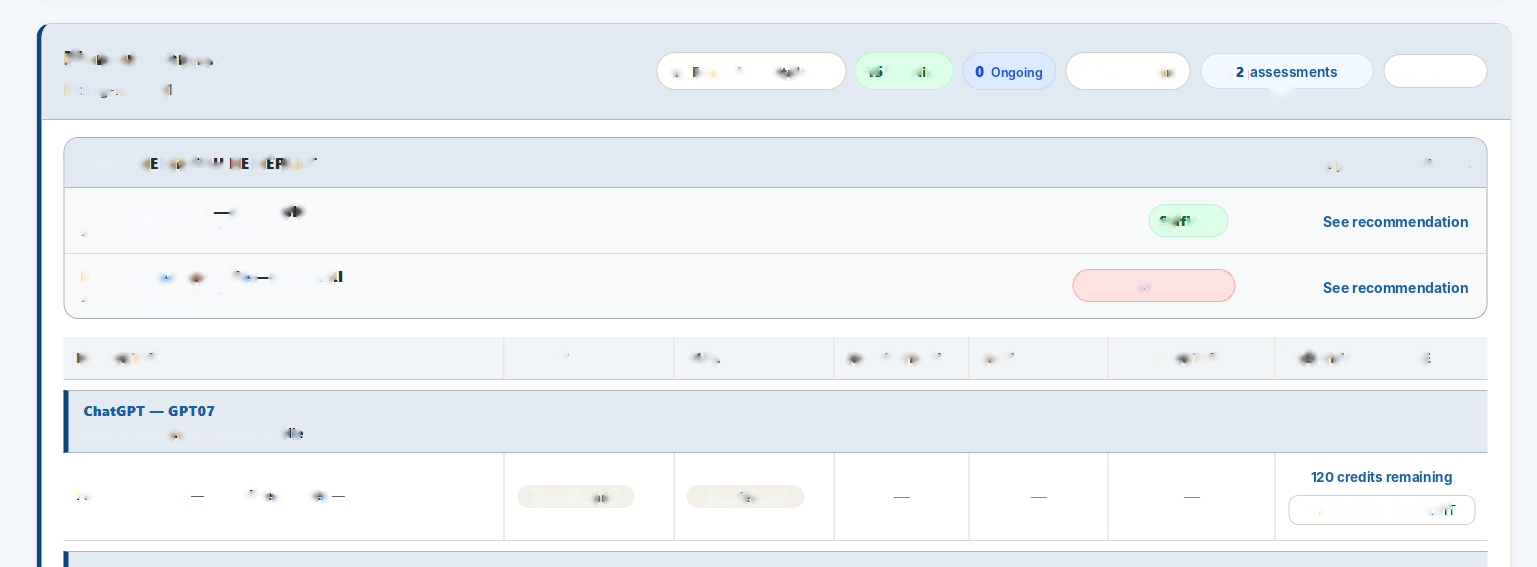
When you open a learner detail view, you first see the learner summary and then a YOUR STARTING LEVEL block. This block lists the learning paths already assessed, the assessment date, the score obtained and a result such as “Sufficient” or “Prerequisites insufficient”, with a link to the recommendation.
Lower on the page, the table details each Learning Workspace with several columns: lessons, quiz, certificate, review, complaint, credits and top-up. Statuses such as “Not started”, “In progress” or “Completed” make it easy to read the learner’s situation. Remaining credits and top-up options appear in the last column.
- Assigned courses: total volume of courses assigned to the learner.
- Completed: courses fully completed.
- In progress: courses already started but not yet completed.
- Not started: assigned courses that have never been started.
- Starting-level assessments: initial assessments already completed.
- Inside the starting-level block, the numerical score (for example 100/100 or 28/100) is used to qualify the level and guide the recommendation.
9. Support & tickets
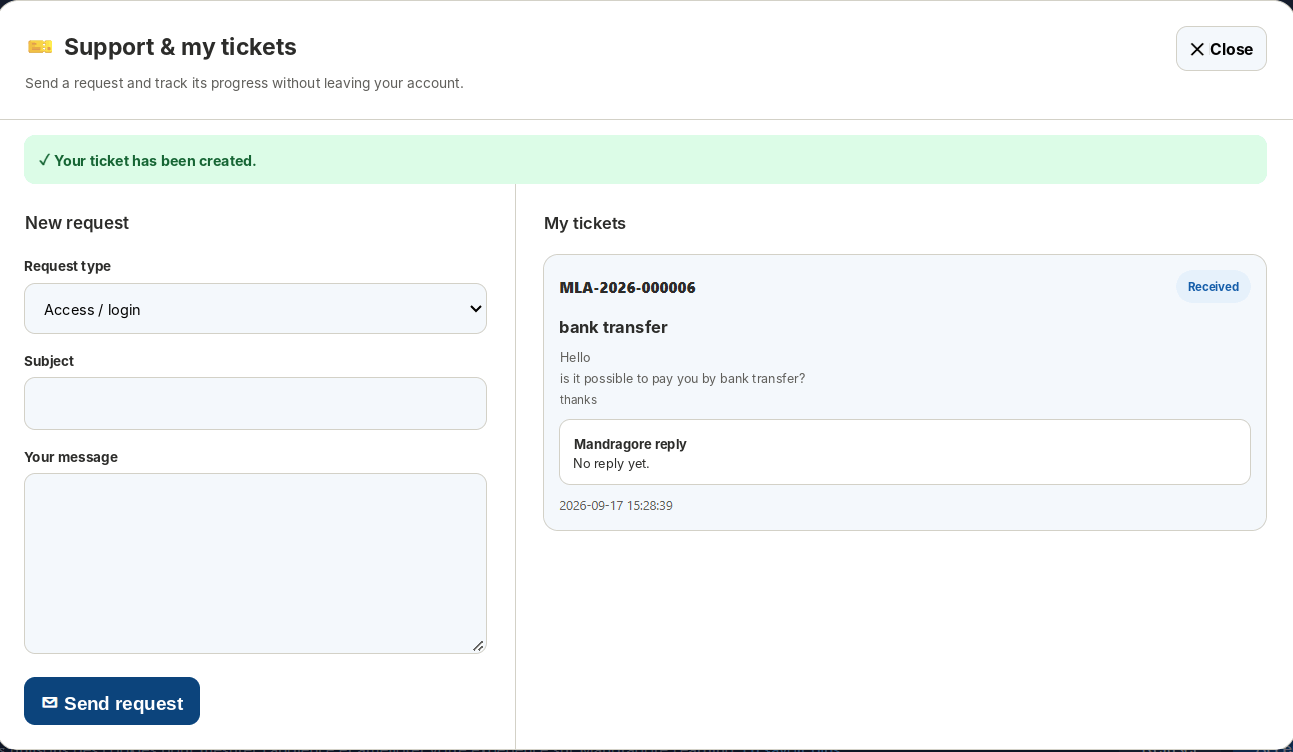
The Support button opens a modal window without leaving the account. On the left, the person responsible for training in the organisation can create a new request by choosing a request type, subject and message.
On the right, My tickets keeps the history of requests. Each ticket shows its number, subject, submitted message, date, status and the Mandragore response when one is available.
The status shows how the ticket is progressing: Received, then Answered, then Closed. The ticket remains visible in the history so the exchange stays traceable.
10. Purchase history and invoices
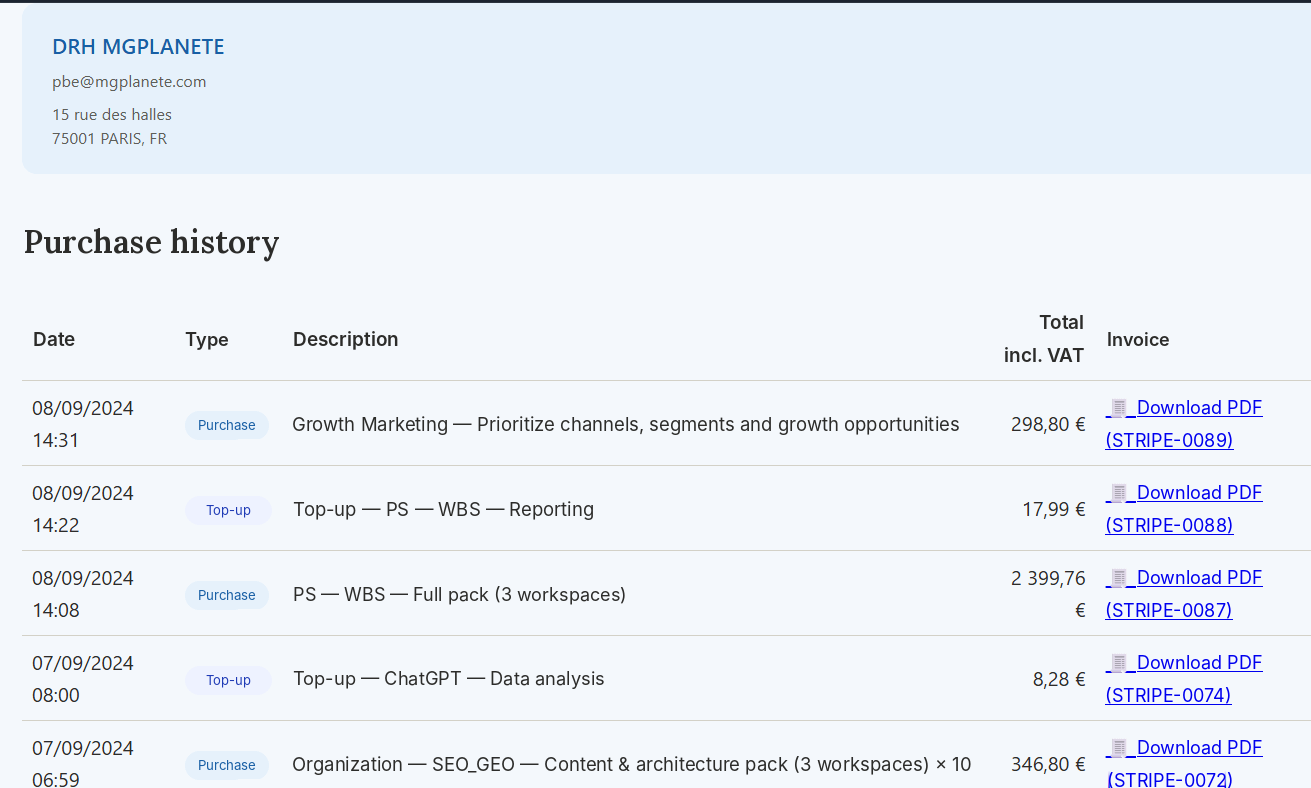
Purchase history groups the organisation’s purchases and credit top-ups. Each row shows the date, operation type, item and billed amount.
The Invoice column provides the corresponding PDF invoice for download. The history clearly distinguishes Learning Workspace purchases, packs and top-ups.
This page is therefore the reference point for reviewing the Organisation / HR account’s financial operations and related invoices.